Valorant is a 5v5 Character-based Tactical First-Person Shooter game available for free download on Windows PC only. But despite no official support for Valorant on Mac OS, there are indeed alternate workarounds to run the game smoothly! Using alternate third-party software like Boot Camp and Parallels, you can Download, Install, and Play Valorant on your MacBook and other compatible Apple Devices!
MacBook System Requirements For Valorant
The general system requirements to run the game on any platform, including Mac OS, are as follows:
| OS: | Windows 11 (64-bit) |
| RAM: | 4 GB |
| Storage: | 60 GB |
| Video Memory: | 1 GB |
| Connectivity: | 30 Mbps ↓ and 1 Mbps ↑ |
Can You Download & Run Valorant on Mac OS?
It is mandatory to run the game on Windows OS based on general requirements and official game compatibility support. Thus, to download and run Valorant on Apple Machines, we will first Install Windows and then get the game.
There are two ways to Install Valorant for MacBook, which will work exclusively based on your Apple device model.
How to Install Valorant Using Parallels (Only for M Series MacBooks)
Valorant game and Windows 11 64-bit OS both require the TPM module to run on any device. So, we will install the Win 11 64-bit OS using Parallels because it emulates the TPM chipset framework.

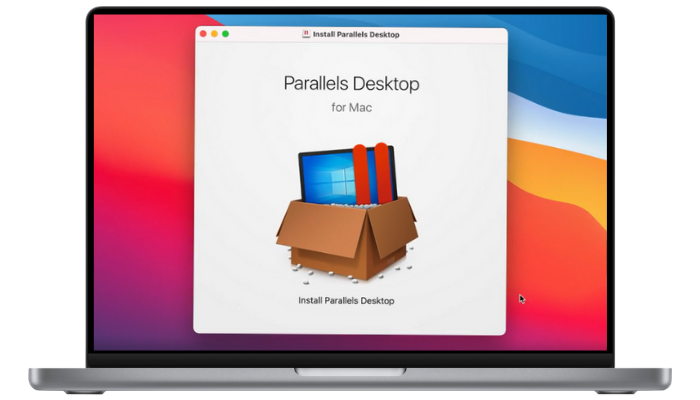
Download & Install Parallels on your M Series Apple Machine
- Run Parallels and follow on-screen prompts.
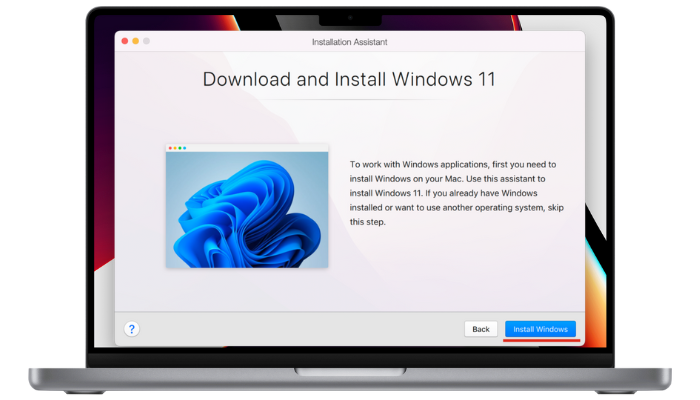
Install Windows 11 64-bit OS Using Parallels
- At the Create New screen, select the option labeled – Install Windows or Another OS from a DVD or image File.
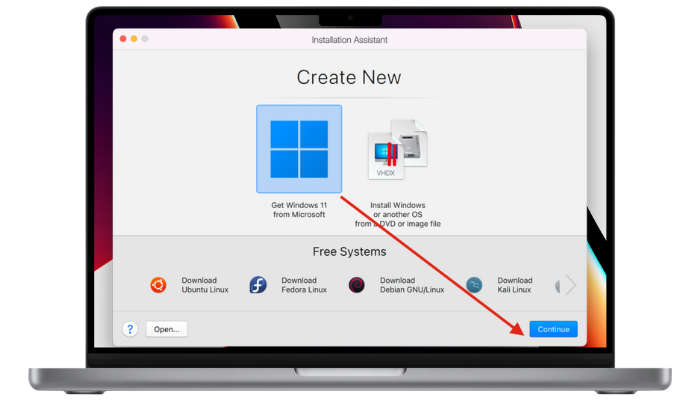
Note: Parallels will confirm that it will use an ARM version of Windows OS – instead, provide the 64-bit OS manually.
- Locate and select the Windows 11 64-bit ISO file on your storage.
(Download a free version from the Store or use the paid copy if you already have one.) - Click on the Install Windows button.
- After successful installation, select the Gaming option as the intended use of Windows on your Mac and assign a name to the OS.
- Next, click the Create alias on Mac button and tick the box labeled Customize settings before installation. Again, click on the Create button.
- At the Customize screen, use the slider to increase your RAM.
- (If you have an M1 or M2 Mac with 16 GB RAM or more, select 8 GB RAM.)
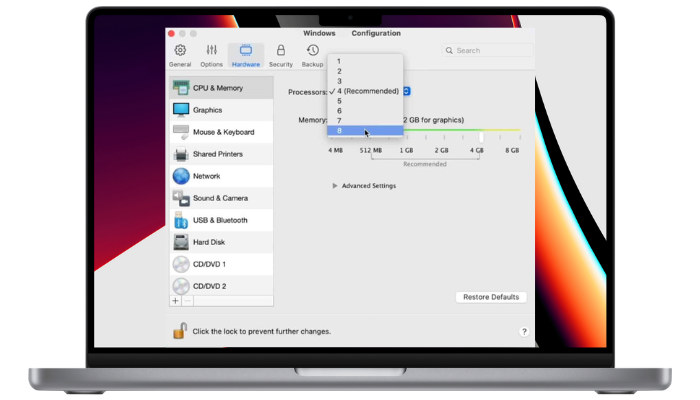
- Click on the Continue button to continue launching Windows 11
- Allow access to Camera, Microphone, Bluetooth
- Complete the Sign In, if required.
- After you boot into Windows 11, please follow the Steps to Play Valorant on Mac OS.
(Remember to Sign Up if you don’t have a Riot ID!)
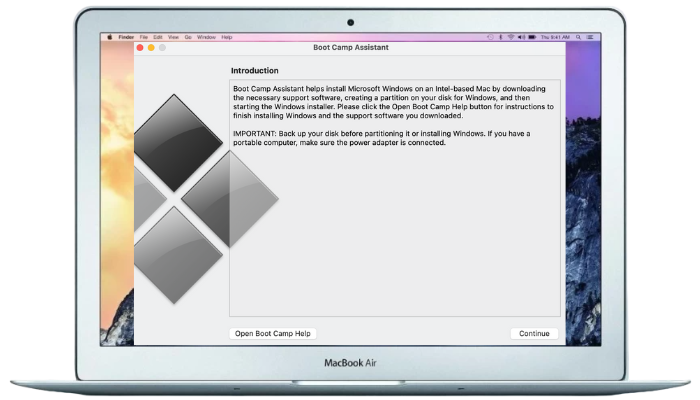
How To Install Valorant Using Boot Camp (Only for Intel Macbooks)
The Boot Camp app is preinstalled on Intel-based Apple devices, and it only works for the following specific Apple devices to get Valorant on Mac.
| Device Model | Year |
| MacBook Air (i5 – i7 Only) | 2012 – 2018 |
| Mac Pro | 2019 |
| Mac Mini | 2012 – 2018 |
| iMac (i5 – i7 Only) | 2012 – 2020 |
| iMac Pro | 2017 |
| Macbook Pro (i5 – i7 Only) | 2012 – 2019 |
Prepare Your System
- Change Secure Boot Settings inside the settings menu from ‘Full Security’ to ‘No Security‘.
- Revert it to ‘Full Security’ after the game installation completes, as it will not affect when you boot Windows OS on your Mac.
- Please update the Boot Camp app and your Apple Device OS and then get the Windows 11 ISO file. (Obtain it from the Store or use your paid copy if you have one.)
- Ensure your device has 80 GB of free space on local storage.
- Launch the Boot Camp app on your Apple device.
Copy System Files
- Connect an empty flash drive (Must have 8GB free space) and select it in Boot Camp.
- Click on the ‘Choose…’ button, then select the Windows 11 ISO file and click on Confirm.
- The Boot Camp app will now copy the Windows 11 ISO file into the flash drive and auto-download the new drivers.
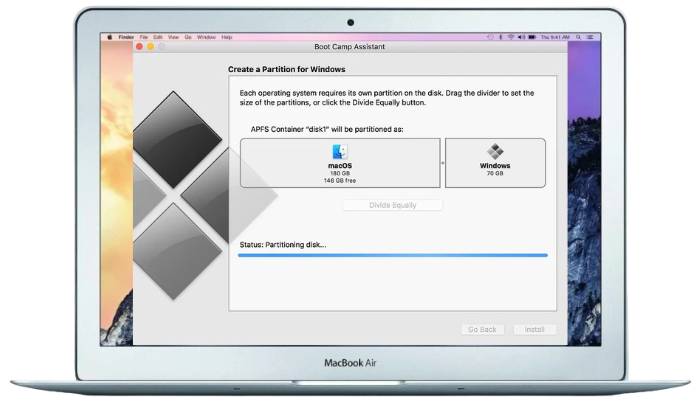
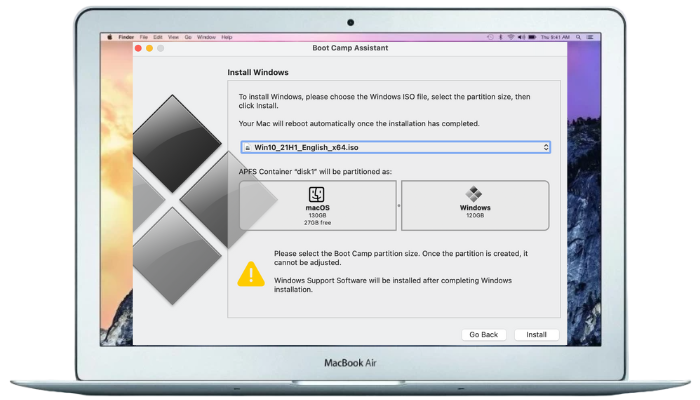
Install Windows 11 64-bit OS Using Boot Camp
- After the files are copied, Create a new partition on your hard drive from the free space.
- Follow the on-screen prompts to install Windows OS on the new partition.
- After a few system restarts, the Welcome to Boot Camp Installer will resume installing Windows 11 OS on Mac. Allow permissions to the prompts on-screen.
- Press and hold the Option key when you Restart your device to access the bootloader.
- Select Windows 11 OS and once boot to Desktop, Check & Install pending system updates.
- After you boot into Windows 11, please follow the Steps to Play Valorant on Mac OS. (Remember to Sign Up if you don’t have a Riot ID!)
Steps To Play Valorant on Mac OS

- Download Valorant Game Client or get it from the official website.
- Click on the ‘Download’ button and then save the Riot game client to local storage.
- Locate and double-click the ‘Install VALORANT.exe’ file, then click on ‘Run’ and ‘Yes.’
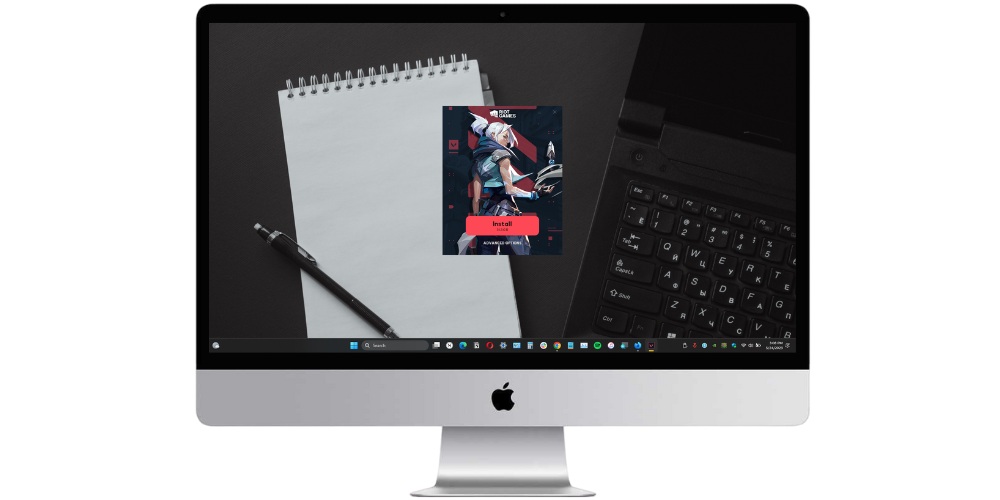
- Click the Install button and then let the Riot client download and install the Valorant game files.
- Log In to the game client with Riot ID while downloading game files.
- At the Terms of Service dialogue, Scroll Down and click on the Accept button.
- When you see the Valorant Anti-Cheat Client Initialization Failed error message, close any running programs to Restart Windows System.
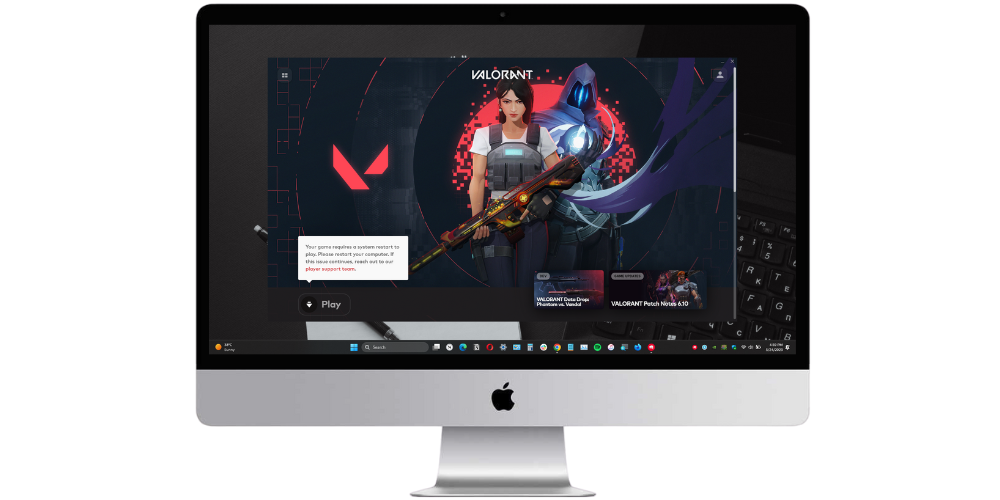
- After the restart, launch the game using VALORANT.EXE and Click on Play.
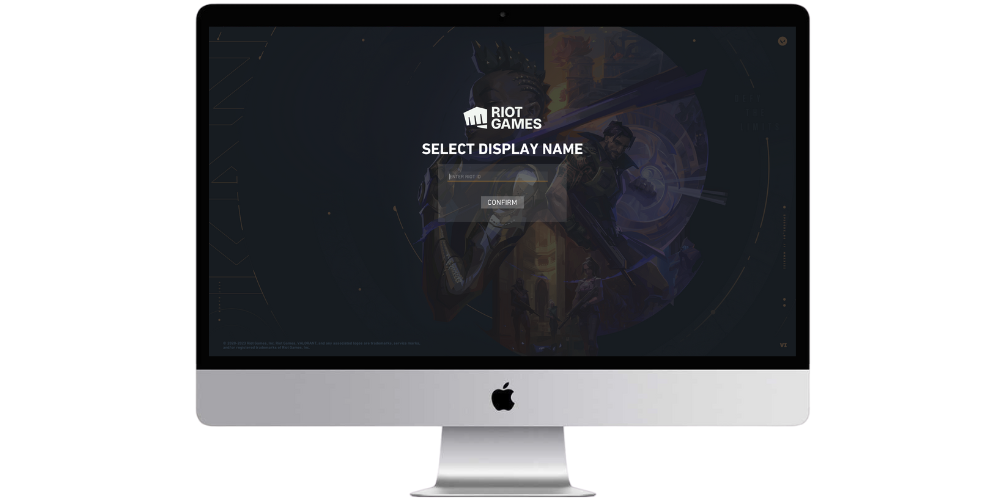
- Next, click on I Understand at the Photosensitivity Warning message to access the SELECT DISPLAY NAME screen. Input a unique name and click on Confirm.
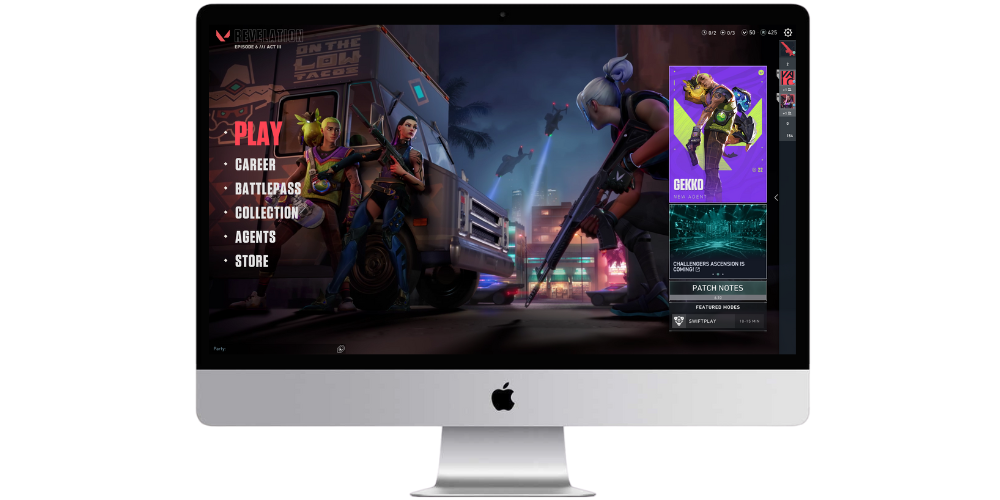
- At the Valorant Home Screen, Click on Play to access the game lobby.
- Select Unrated or other game mode, and then click on the Start button.
- Congratulations, you have successfully Installed Valorant on Mac, and you can play it now!
Summary
The Valorant game Mac download steps for your Apple device will vary depending on its build model. So please ensure you use the correct steps, and remember to optimize your system for gaming for a smooth gameplay experience. After you apply specific tips and tricks to get the best performance on the Intel & M Series, you can prevent overheating and other issues.
| DISCLAIMER: DownloadValorant does not guarantee stable gameplay performance nor accepts any liabilities arising from it. Please backup your important files before you run Parallels or Boot Camp (at your own risk) to install and play the game. |